
Project · I2C · Sensor test
Compare four I2C sensors on one ESP dashboard — and watch them drift
A BME280, BMP280, AHT20 and HDC1080 share a single I2C bus. Each one gets its live value and a trend chart, side by side, so you can see at a glance which sensors agree — and which don't. No cloud, no app. In this run the HDC1080 read almost 10% higher humidity than the BME280 sitting 5 mm away.
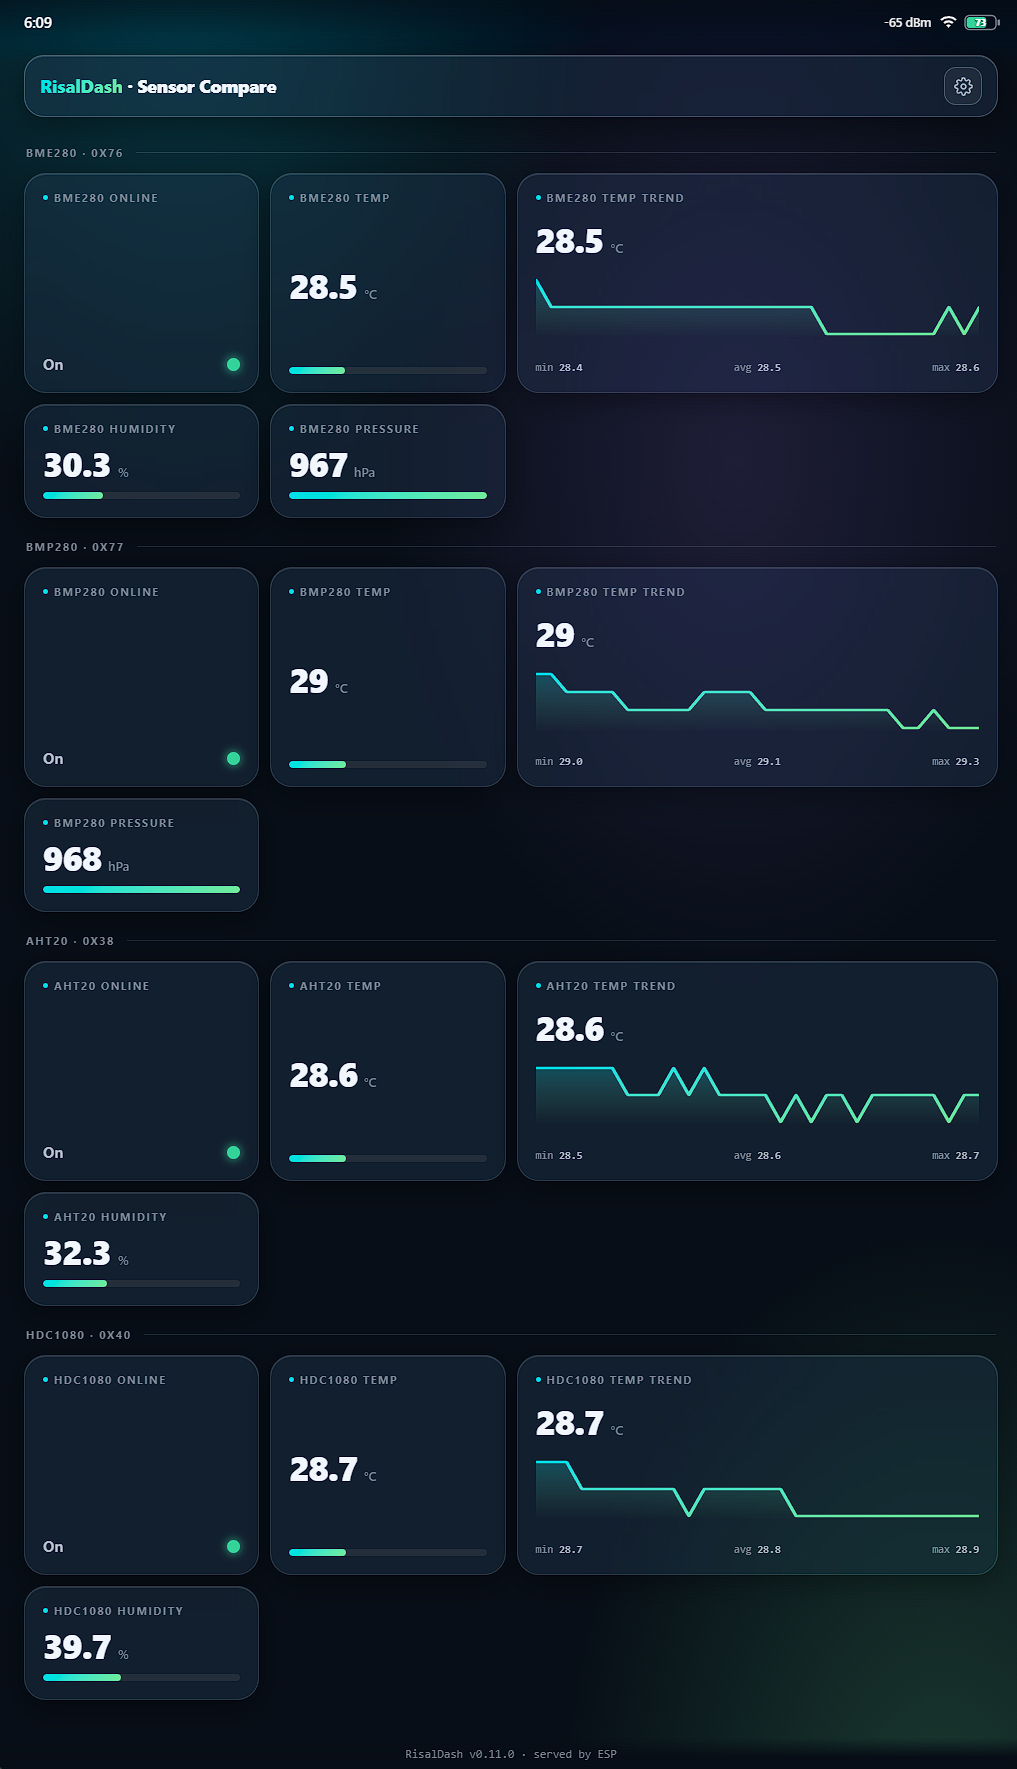
Every temperature/humidity sensor claims a tolerance on its datasheet, but the honest test is putting several of them in the same air and reading them at the same instant. This project does exactly that: four popular I2C parts — BME280, BMP280, AHT20 and HDC1080 — on one bus, one ESP32 or ESP8266, and one web dashboard that shows all of them at once.
It's built with RisalDash, an open-source Arduino library that turns a few
dash.metric(...) / dash.chart(...) calls into a responsive, live
dashboard served straight from the board over WebSocket.
What the numbers said
All four came online together. The temperatures were tight — within about half a degree. The humidity was the interesting part:
| Sensor | Addr | Temp | Humidity | Pressure |
|---|---|---|---|---|
| BME280 | 0x76 | 28.5 °C | 30.3 % | 967 hPa |
| BMP280 | 0x77 | 29.0 °C | — | 968 hPa |
| AHT20 | 0x38 | 28.6 °C | 32.3 % | — |
| HDC1080 | 0x40 | 28.7 °C | 39.7 % | — |
The BME280, BMP280 and AHT20 clustered around 30–32% relative humidity. The HDC1080 sat at 39.7% — nearly ten points higher. Neither is obviously "wrong": this is exactly the kind of unit-to-unit offset you only catch by comparing sensors in the same breath. It's also a great argument for calibrating against a reference rather than trusting one bare module. The two pressure sensors (BME280 vs BMP280) agreed to within 1 hPa.
The hardware
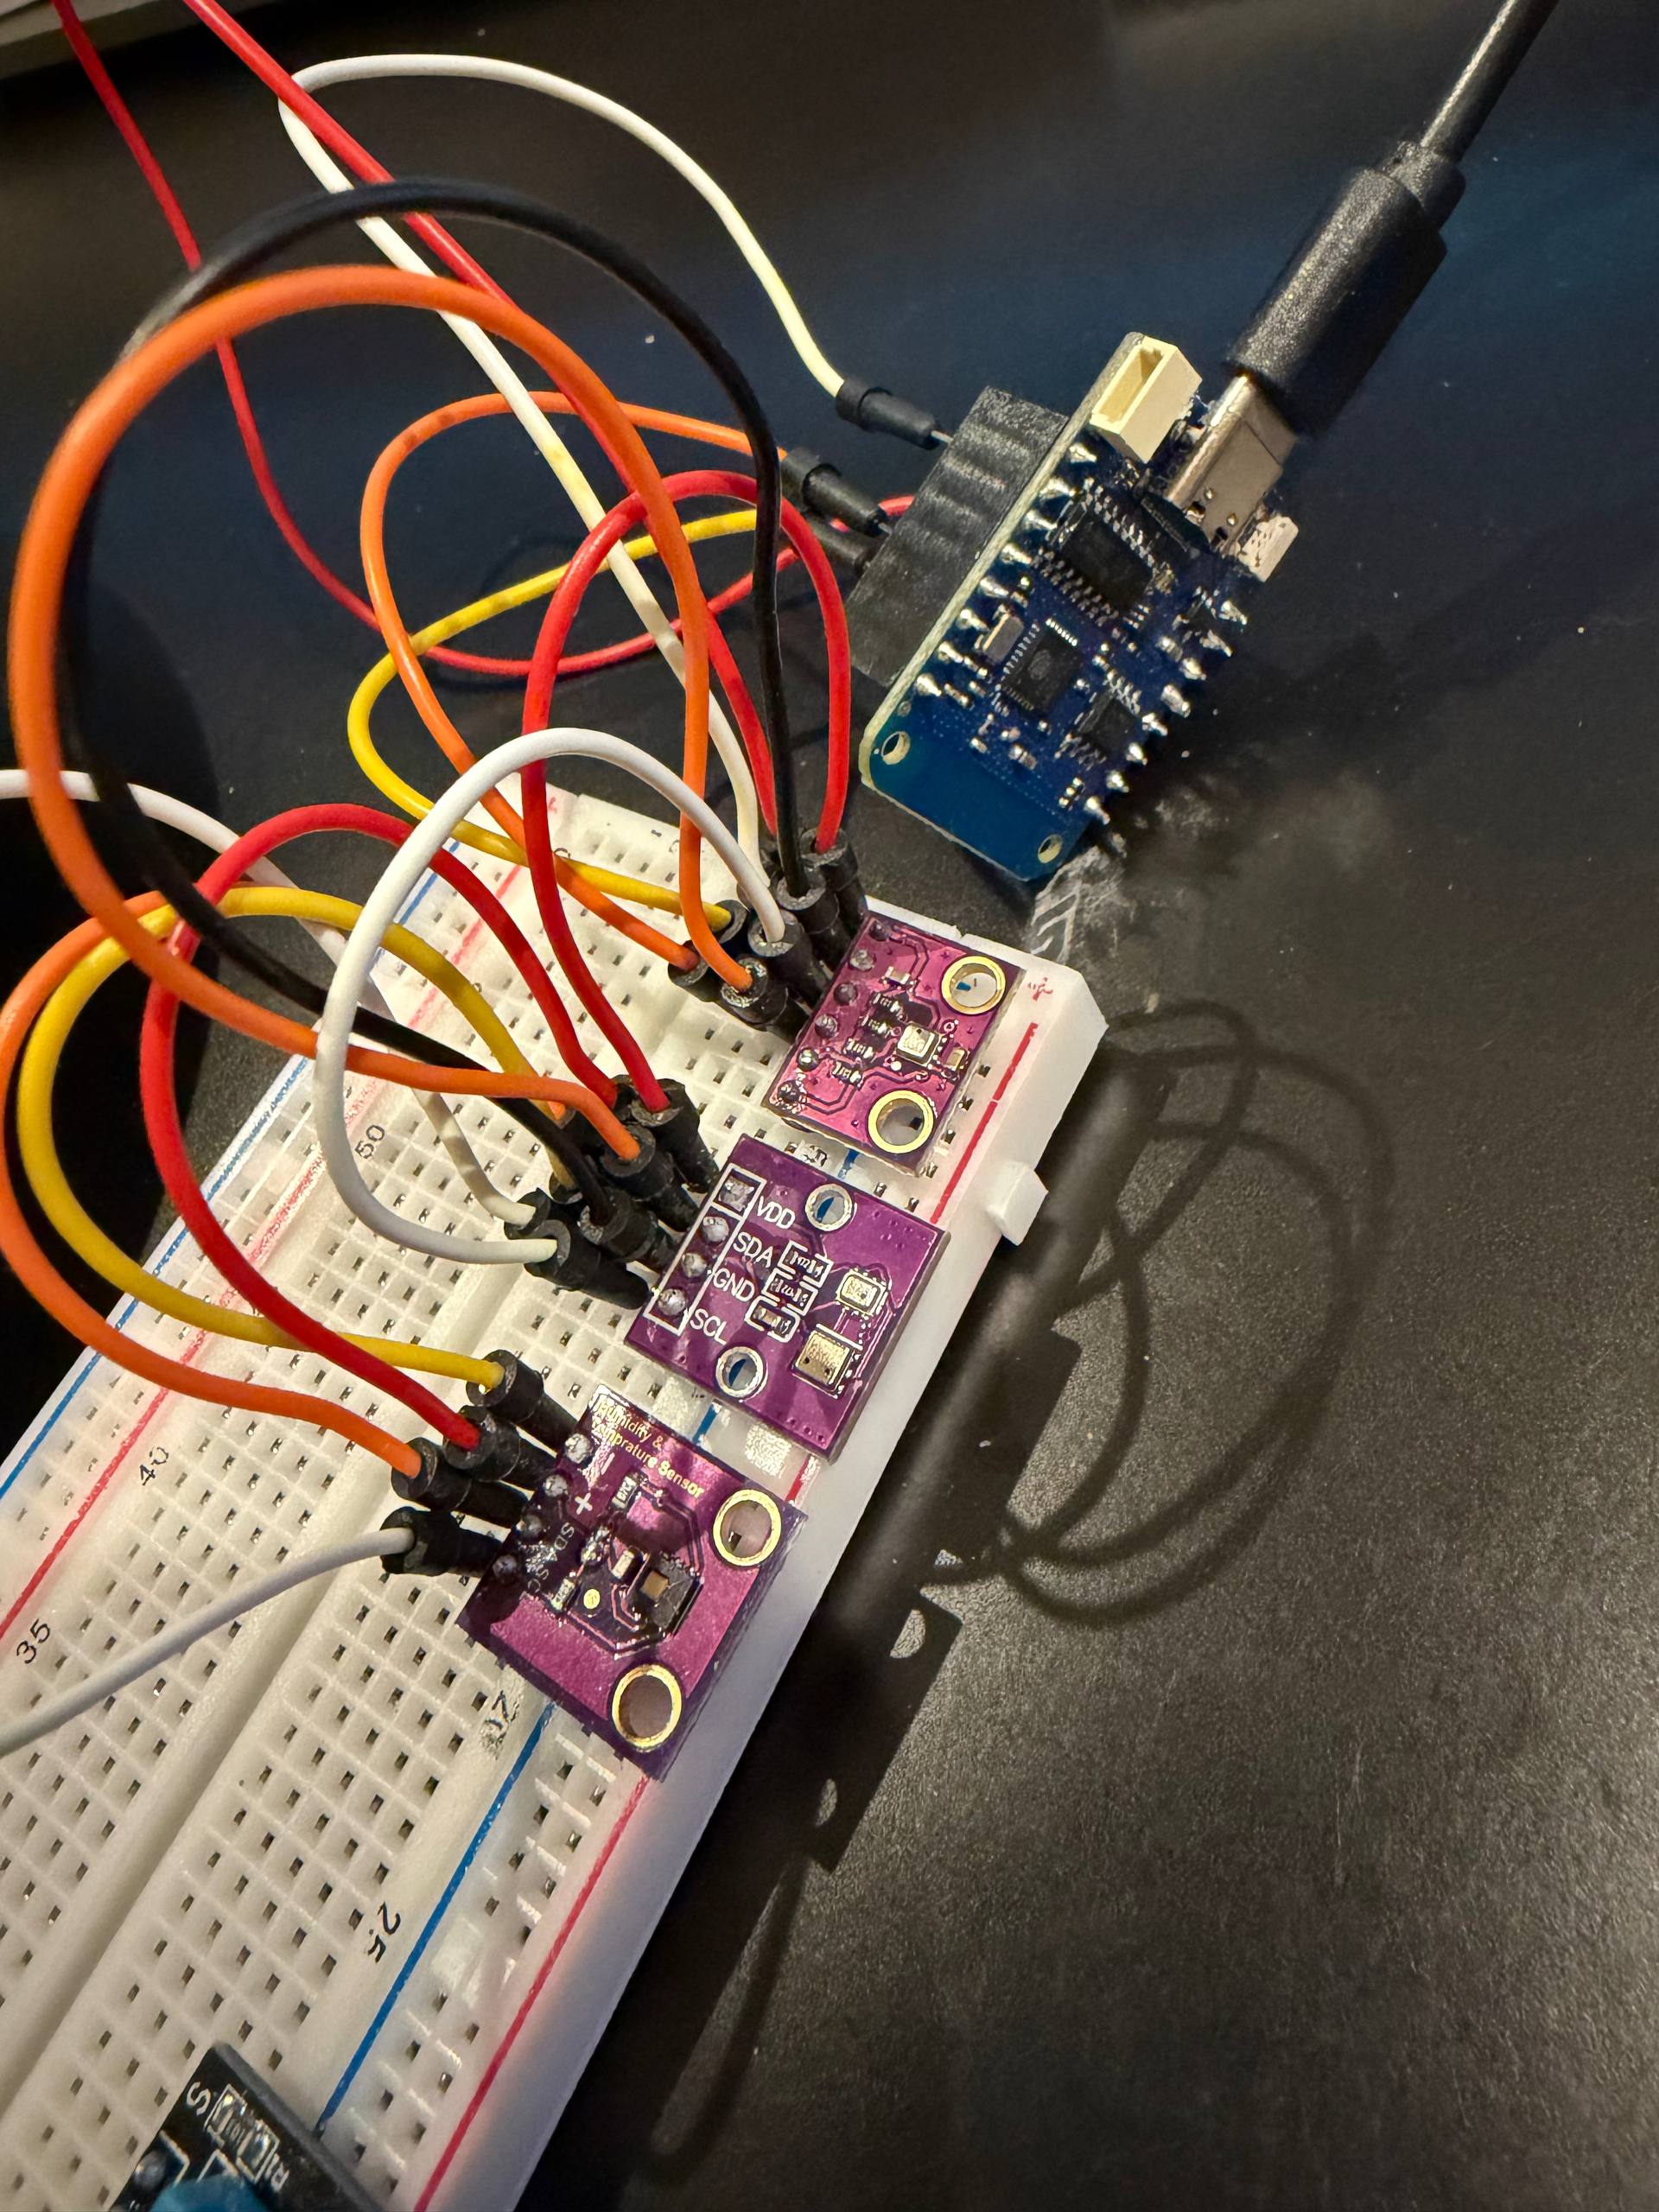
- ESP8266 (Wemos D1 mini) or ESP32 — ~$3–5
- BME280 (0x76), BMP280 (0x77), AHT20 (0x38), HDC1080 (0x40) — a few dollars each
- A breadboard and jumper wires
Wiring is as simple as it gets: every sensor shares the same four wires —
SDA, SCL, 3V3 and GND. That's the whole point of I2C. On an ESP8266 the bus is
SDA = D2 (GPIO4), SCL = D1 (GPIO5); on an ESP32 it's
GPIO21 / GPIO22. Each device answers on its own address, so there's no conflict as
long as no two parts share one — here all four are distinct.
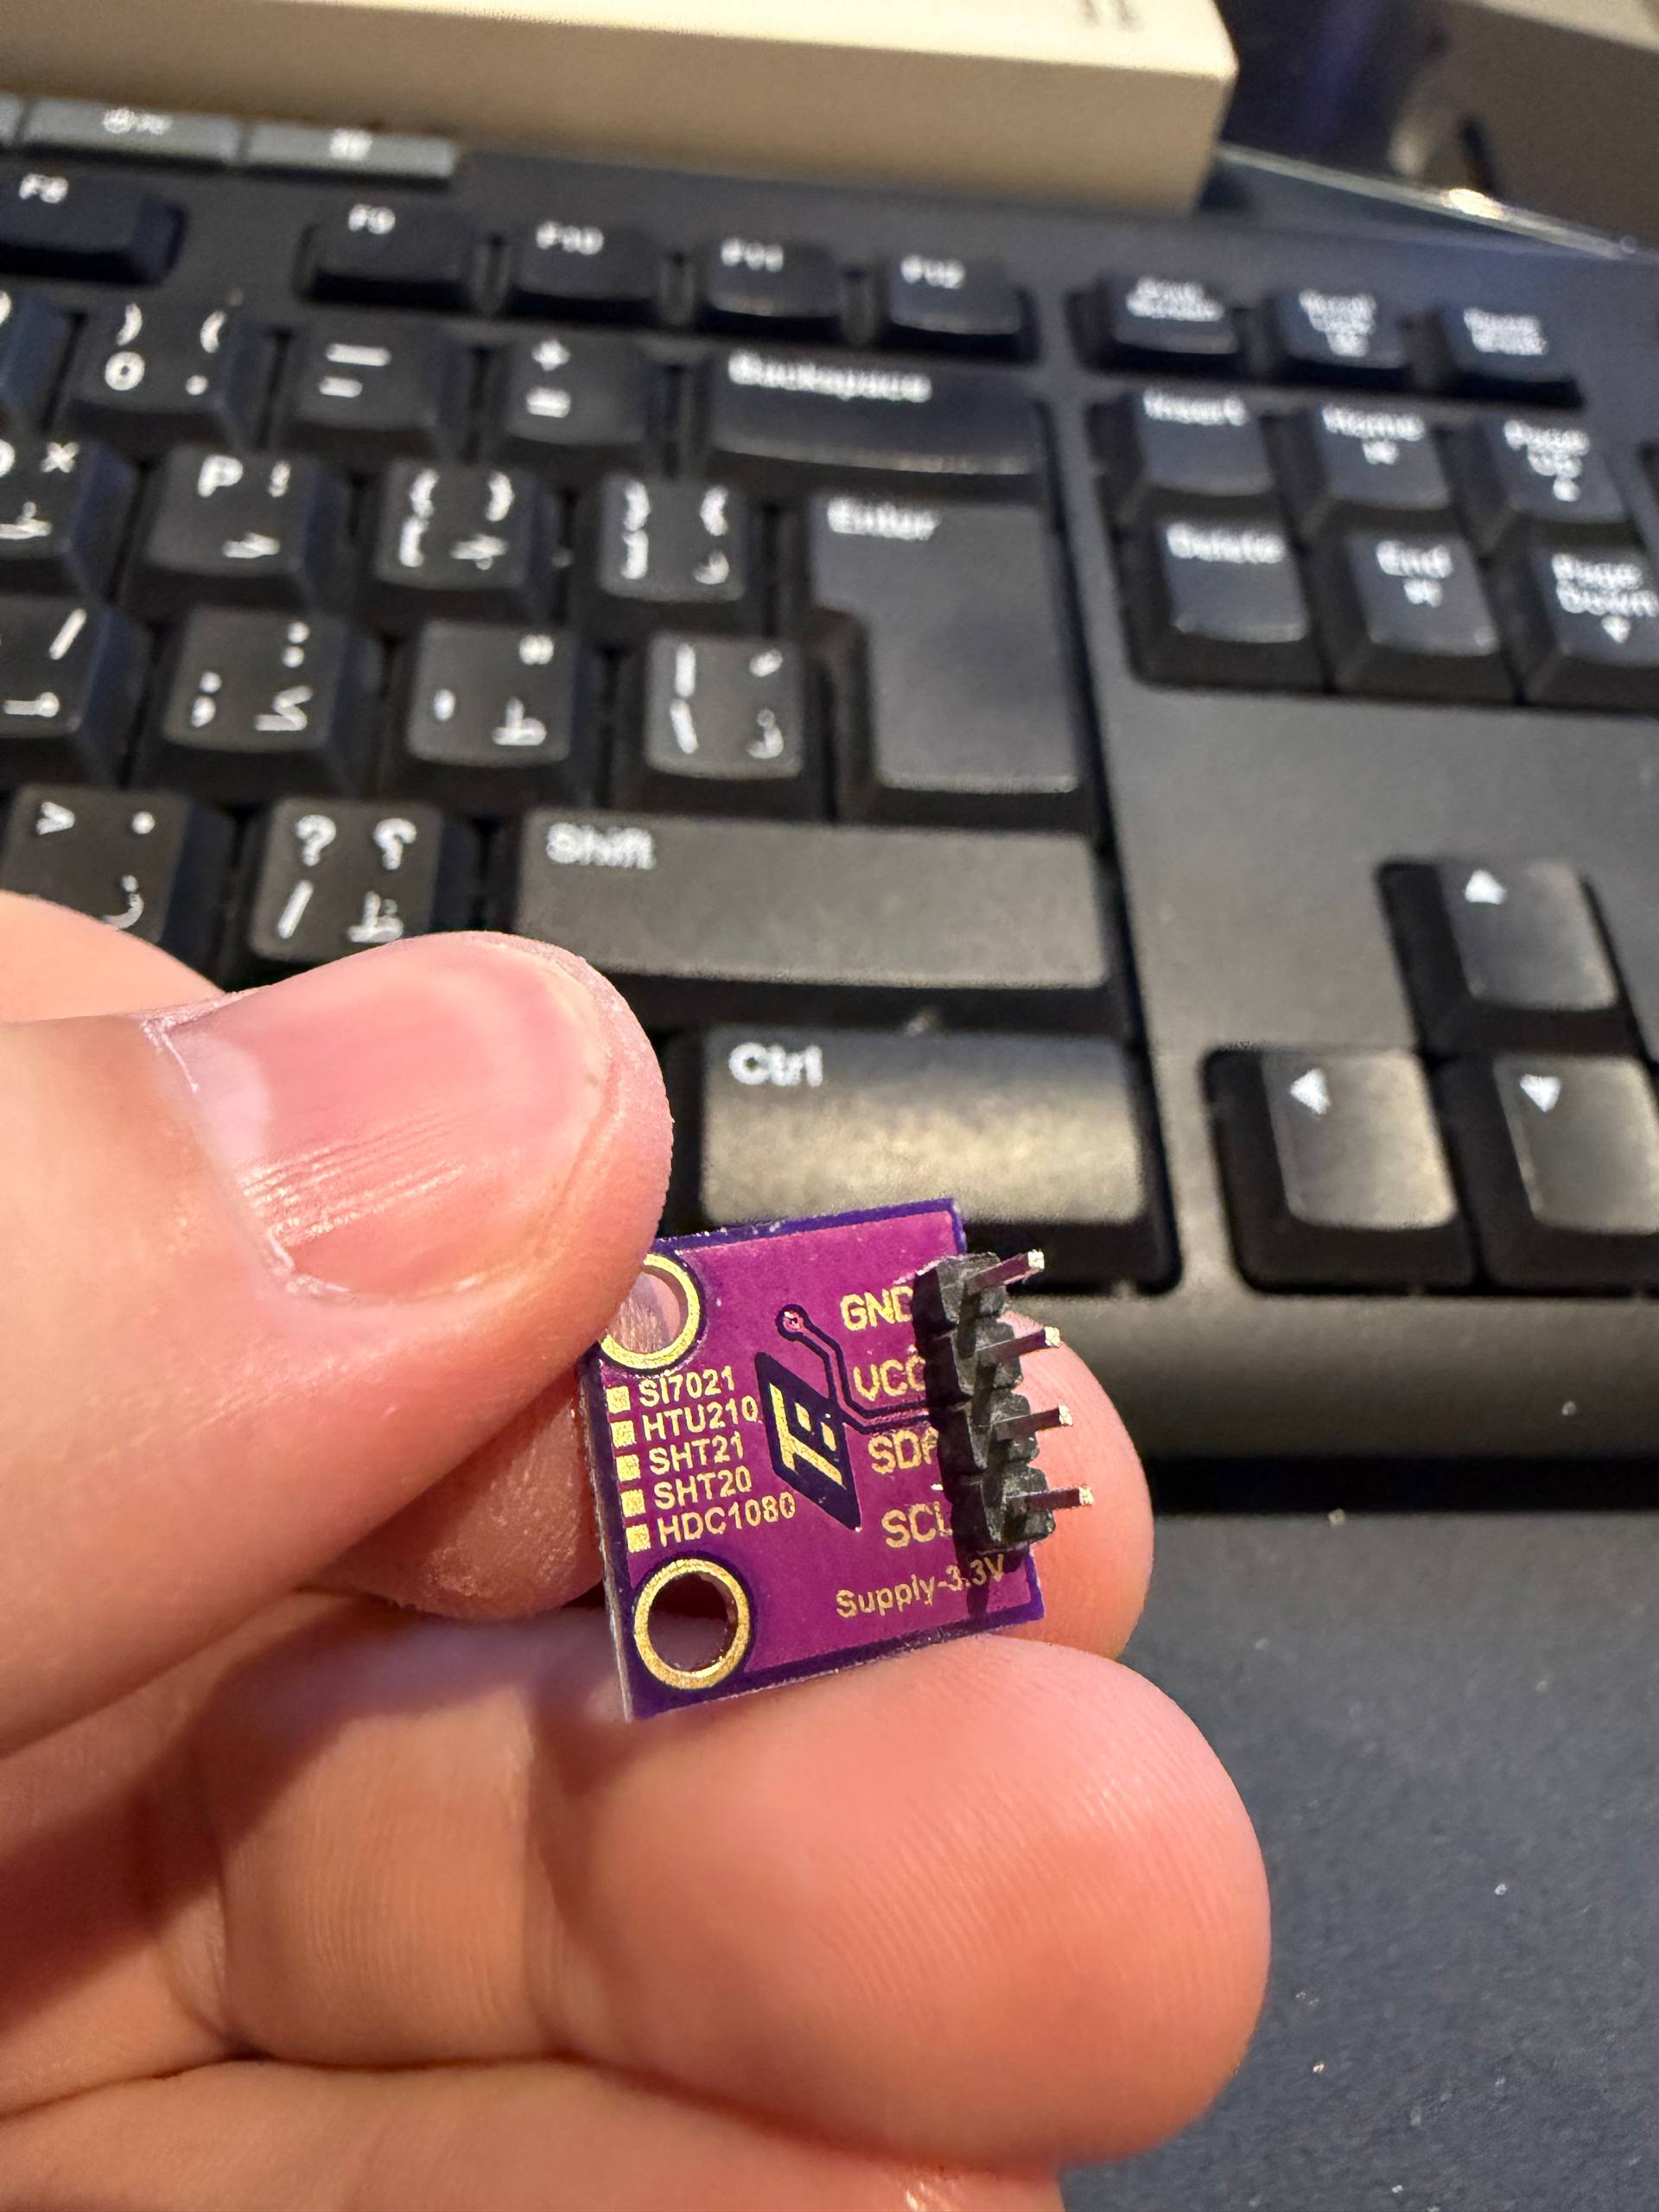
0x40.That silkscreen is a classic trap: the same PCB is sold with any of five different chips fitted, and they use different drivers. If you're not sure what you've got, the companion I2C Scanner example prints every address on the bus with a best-guess of the chip — plug the board in and it tells you.
The code
The dashboard is declarative. Each sensor is a small block — an online LED, a couple of metrics and a trend chart — and RisalDash lays them out and streams the values live:
#include <RisalDash.h>
#include <Wire.h>
#include <Adafruit_BME280.h>
#include <Adafruit_BMP280.h>
#include <Adafruit_AHTX0.h>
#include <ClosedCube_HDC1080.h>

RisalUI dash("Sensor Compare");

void setup() {
  Wire.begin();                       // ESP8266: D2/D1  ·  ESP32: 21/22
  bmeOK = bme.begin(0x76);            // auto-detect: plug it in, it comes online
  bmpOK = bmp.begin(0x77);
  ahtOK = aht.begin();                // 0x38
  hdcOK = i2cPresent(0x40);

  dash.separator("BME280 · 0x76");
  dash.led("BME280 online", &bmeOK);
  dash.metric("BME280 temp", &bmeT, "°C").decimals(1);
  dash.chart("BME280 temp trend", &bmeT, "°C");
  dash.metric("BME280 humidity", &bmeH, "%").decimals(1);
  // ...three more blocks: BMP280, AHT20, HDC1080

  dash.enableOTA();
  dash.apName("SensorCompare");
  dash.begin();                       // captive portal, then joins your Wi-Fi
}
Sensors are auto-detected: begin() returns whether the chip
answered, and that same boolean drives the "online" LED on the card. Pull a sensor off the bus and
its card simply reads offline — the others keep running. Read the values every two seconds in
loop() with isnan() guards, and every open browser updates at once.
Wi-Fi setup — exactly like every RisalDash project
There's nothing to hard-code. On first boot the board can't find a saved network, so it raises a
captive-portal access point called SensorCompare. Connect your
phone to it, the setup page pops up automatically, you pick your home Wi-Fi and type the password.
The ESP saves the credentials, reboots, and from then on joins your network on its
own — the dashboard is waiting at its IP on your LAN. Everything is served by the device;
nothing touches a cloud, and your readings never leave your network.
Because dash.enableOTA() is on, later firmware goes over the air from the browser —
no USB cable after the first flash.
Why bother comparing?
If you're logging a greenhouse, a server closet or a reptile enclosure, a 10% humidity offset is the difference between "fine" and "alarm". Watching several sensors together tells you which one to trust, whether a module is drifting, and how much a fresh part disagrees with the one that's been running for a year. It's the cheapest calibration check there is — and it makes a genuinely satisfying live dashboard.
Complete, build-tested source for ESP32 & ESP8266.