
Project · Weather · Outdoor
A complete weather station you actually own
A real weather station is two builds in one: an easy indoor half — BME280 + light — and an outdoor mast with a rain gauge, anemometer and UV sensor. This guide does both on one ESP32, with a live “Clear / Cloudy / Rain” readout, storm and heat alerts, and a dashboard the chip serves itself — no weather-cloud account, your data stays yours.
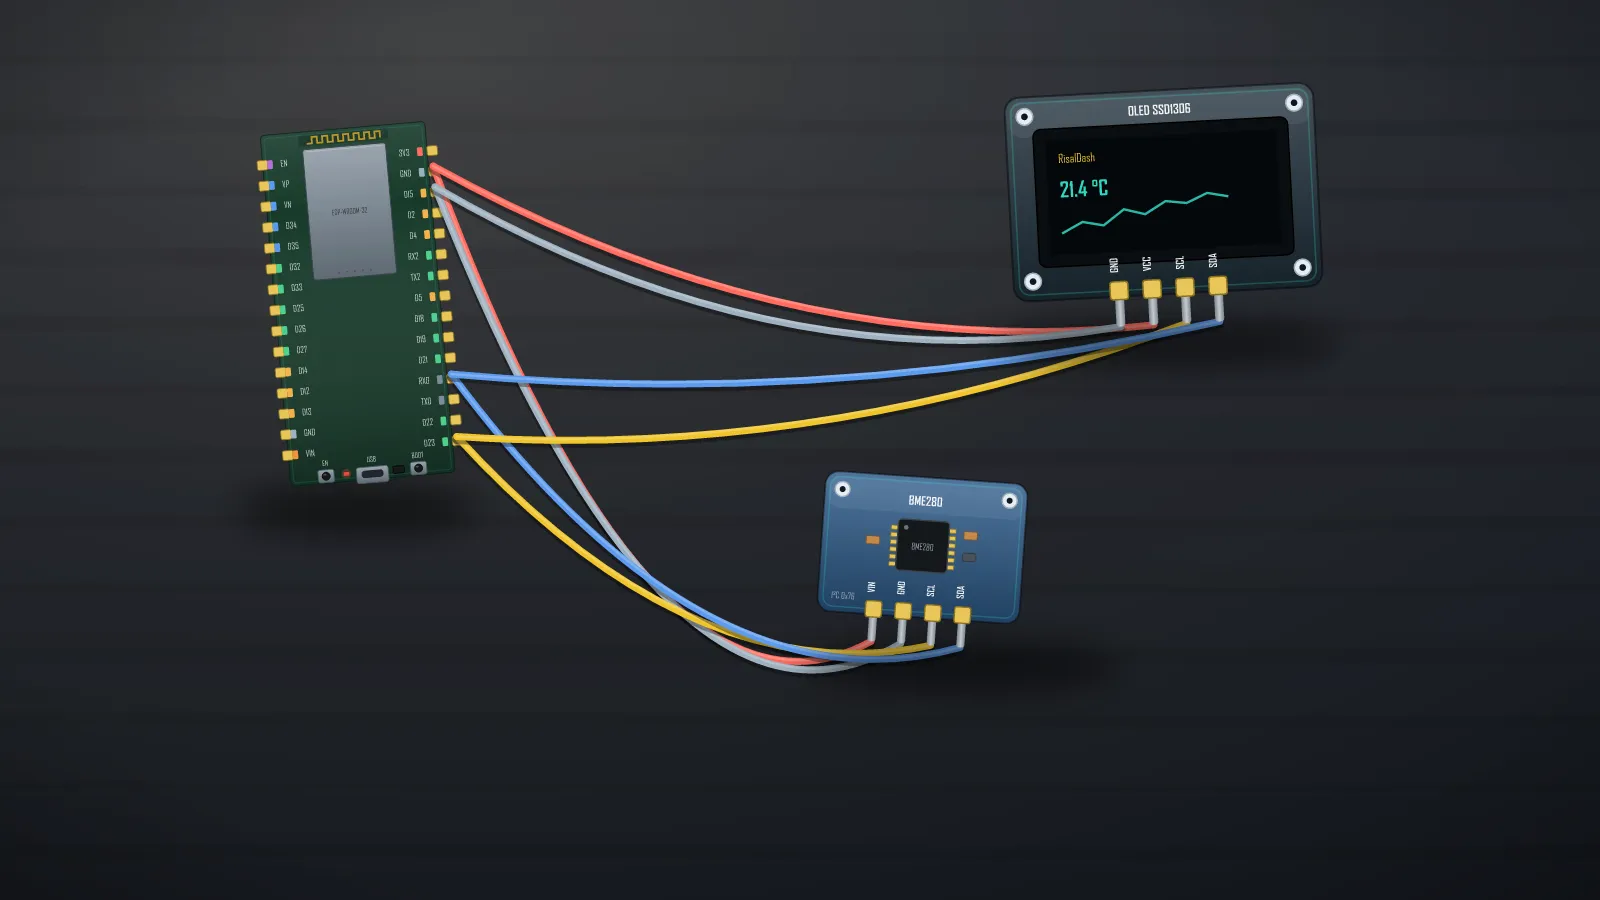
The sensors — what measures what
| Sensor | Measures | Interface | Note |
|---|---|---|---|
| BME280 | temp · humidity · pressure | I²C | the core — pressure trends forecast rain |
| Tipping bucket | rainfall (mm) | pulse | each tip = a fixed volume |
| Anemometer cups | wind speed / gusts | pulse (interrupt) | reed switch, once per turn |
| Wind vane | direction | analog | a resistor ladder per compass point |
| GY-ML8511 | UV index | analog | outdoor sun exposure |
| LDR / BH1750 | light (lux) | analog / I²C | drives the day/night logic |
The BME280 wires like any I²C sensor — SDA/SCL plus power. Pulse sensors (rain, wind) go to interrupt-capable GPIOs; the vane, UV and LDR take ADC pins.
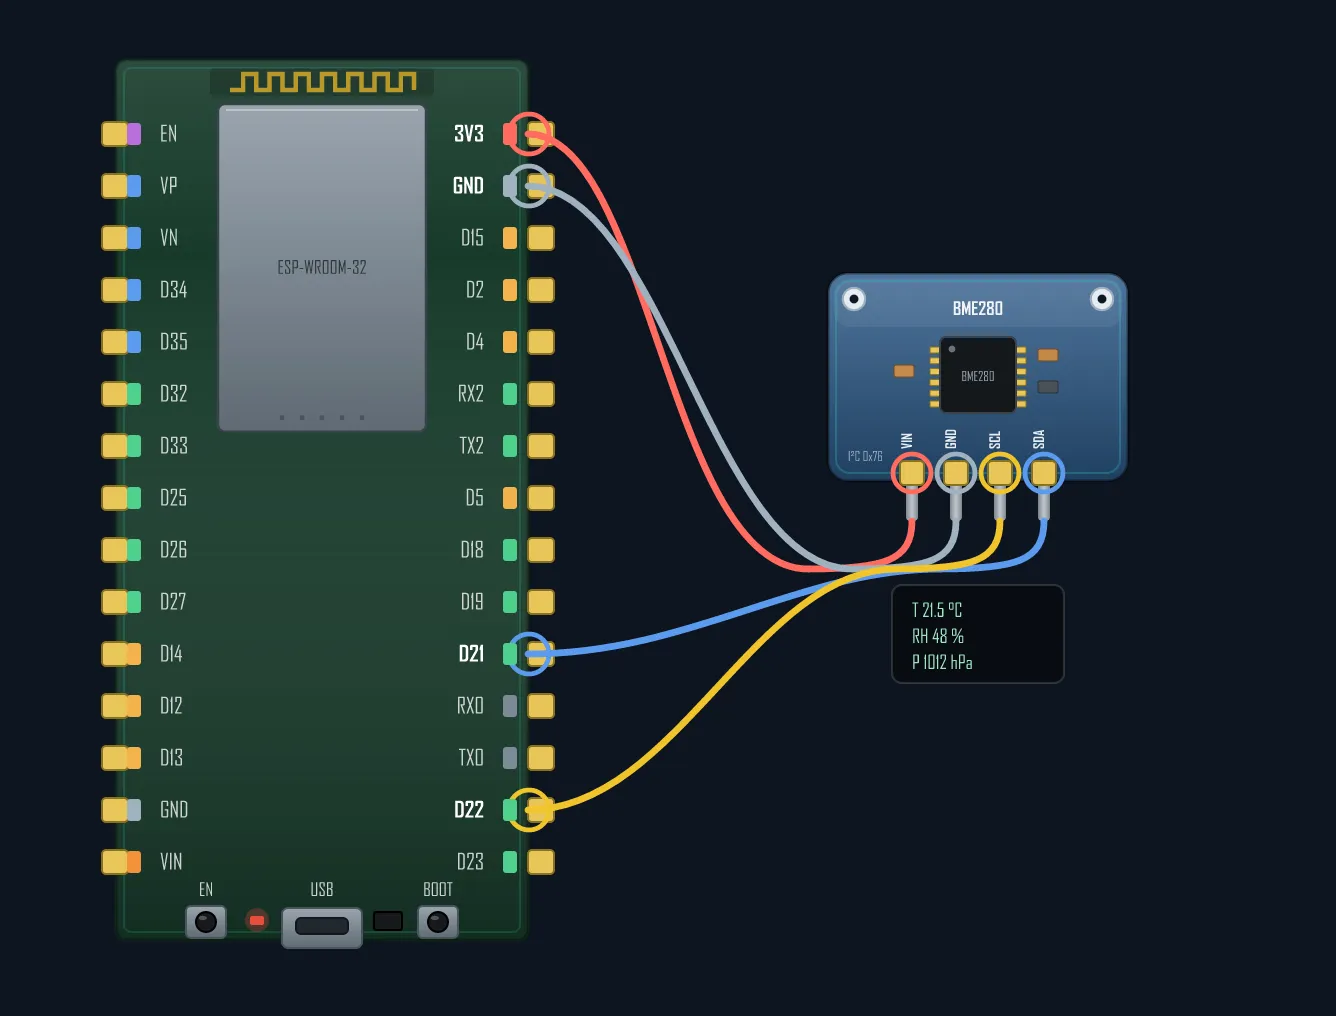
Counting wind — an interrupt, not a loop
The anemometer closes a reed switch once per rotation. Poll it and you miss counts the moment the dashboard breathes — so count in an interrupt and convert once a second:
// Anemometer: a reed switch pulses once per rotation -> count on an interrupt.
volatile uint32_t pulses = 0;
void IRAM_ATTR onPulse() { pulses++; }
// setup: pinMode(WIND_PIN, INPUT_PULLUP); attachInterrupt(WIND_PIN, onPulse, FALLING);
// each second: wind = pulses * KMH_PER_HZ; pulses = 0;   (KMH_PER_HZ from the cup datasheet)
The dashboard — one preset does the mast
dash.sensor("weather", …) expands into the full anemometer + vane + rain-bucket set
with the right units and ranges; the rest is a gauge, a badge and a log:
dash.layout("Weather", RICON_WATER);
dash.sensor("weather", &wind, &gust, &dir, &rain); // anemometer · vane · rain preset
dash.gauge("UV index", &uv, 0, 12);
dash.badge("Conditions", &sky).labels("Clear", "Cloudy", "Rain");
dash.led("Weather alert", &alarmOut);              // red LED + buzzer outside
evlog = &dash.log("Alerts", 5);

dash.layout("Ambient", RICON_THERMOMETER);
dash.sensor("bme280", &temp, &hum, &pres).chart(); // T / RH / hPa with history
dash.metric("Light", &lux, "lx");                  // LDR or BH1750
dash.beginAP("RisalDash-Weather", "12345678");
Conditions & alerts — small logic, big feel
“Is it raining?” is just the rain total ticking. “Cloudy?” — daylight below a threshold. A storm gust or extreme heat trips the alert LED (wire a buzzer to the same pin) and writes a log line:
// Conditions: raining if the bucket is ticking, else clear vs dim by daylight.
bool raining = rain - rainPrev > 0.01f;
rainPrev = rain;
sky = raining ? 2 : (lux < 8000 ? 1 : 0);

// Alerts: a storm gust or extreme heat trips the LED/buzzer + a log line.
bool trip = gust > 60 || temp > 40;
if (trip && !alarmOut && evlog)
  evlog->print(gust > 60 ? "STORM - gusts over 60 km/h" : "HEAT - over 40 C");
alarmOut = trip;
The shipped example (examples/04_Templates/WeatherStation) runs all of this with no hardware: gusty wind, passing showers that accumulate, a UV index and daylight that follow a virtual sun. Watch the “Rain” badge and storm alert fire tonight, then swap in the real drivers sensor by sensor — the fake-sensor workflow.
Grow it
Add deep sleep and a LiFePO4
cell for a solar mast that runs for months; pull a live Open-Meteo forecast (the library's
RisalWeather.h, no API key) alongside your own readings; or publish to MQTT for
Home Assistant. For the screen on your desk, any display from the
display guide works from the same variables.
The whole station runs on fakes today — the mast can come sensor by sensor.